

Embarking on a kitchen renovation is exciting, but a well-structured timeline is paramount for success. This guide helps you navigate each phase, from initial planning and design selections to the actual construction and final touches. By understanding lead times and coordinating tasks, you can avoid common pitfalls and achieve your dream kitchen efficiently and without undue stress, making your kitchen renovation timeline a smooth journey.
Dreaming of a brand-new kitchen? You’re not alone! The kitchen is often called the heart of the home, and transforming it can dramatically improve your daily life and add significant value to your property. But let’s be honest: a kitchen renovation can also feel like a daunting task, filled with endless decisions, potential hidden costs, and the disruption of daily routines. That’s where a well-thought-out kitchen renovation timeline comes into play.
Think of your timeline as the roadmap for your renovation journey. Without it, you might find yourself wandering off course, facing unexpected detours, and experiencing unnecessary delays. A clear, realistic timeline helps you manage expectations, coordinate professionals, budget effectively, and ultimately, enjoy a smoother, less stressful transformation. It’s the difference between a chaotic scramble and a well-orchestrated project that unfolds beautifully. Let’s dive into how to plan the perfect kitchen renovation timeline, making your dream kitchen a reality without the headaches.
Key Takeaways
- Early Planning is Key: Dedicate ample time to defining your budget, needs, and hiring qualified professionals *before* any demolition begins to establish a solid foundation for your kitchen renovation timeline.
- Understand Lead Times: Be aware that items like custom cabinets, specific countertops, and specialty appliances often have significant lead times (8-16 weeks or more). Factor these into your overall kitchen renovation timeline to avoid delays.
- Create a Detailed Schedule: Work with your contractor to break down the renovation into clear phases with realistic milestones. Always build in buffer time for unexpected challenges, which are common in any home project.
- Communicate Continuously: Maintain open and frequent communication with your contractor, designer, and all suppliers. Clear communication helps to manage expectations, address issues promptly, and keep your project on track.
- Prepare for Disruptions: Set up a functional temporary kitchen in another area of your home and take steps to protect adjacent living spaces from dust and debris. This preparation significantly eases the living inconvenience during the renovation.
- Budget for the Unexpected: Always allocate a contingency fund, typically 10-20% of your total budget, for unforeseen issues that might arise during construction, like hidden damage or necessary structural adjustments.
- Flexibility is Crucial: While a detailed plan is essential, be prepared for minor delays or adjustments. Renovations rarely follow an exact, minute-by-minute script, and a flexible mindset will reduce stress.
Quick Answers to Common Questions
How long does an average kitchen renovation timeline take?
A typical kitchen renovation, from initial planning to completion, can take anywhere from 10 to 24 weeks. This includes planning, design, material ordering (which often has long lead times), and the actual construction.
What is the most common reason for kitchen renovation delays?
The most common reasons for delays are usually unexpected material lead times (especially for custom items like cabinets and specific appliances) and unforeseen issues uncovered during demolition, such as hidden plumbing or electrical problems.
Should I live in my home during a kitchen renovation?
Many people choose to live in their home during a kitchen renovation, but it requires preparation. Setting up a temporary kitchen and sealing off the renovation area to contain dust and noise can make the experience more bearable.
What is a “punch list” in a renovation?
A punch list is a list of small items that need to be completed or corrected by the contractor after the main work is finished. It’s compiled during a final walkthrough with the homeowner before final payment.
How much should I budget for unexpected costs?
It’s highly recommended to budget a contingency fund of 10-20% of your total renovation budget for unexpected issues. This buffer helps cover unforeseen expenses without derailing your project financially.
📑 Table of Contents
- Phase 1: The Blueprint for Success – Pre-Planning Your Kitchen Renovation Timeline (Weeks 1-8)
- Phase 2: Bringing the Vision to Life – Design and Procurement (Weeks 9-16)
- Phase 3: Gearing Up for Transformation – Pre-Construction Preparations (Weeks 17-18)
- Phase 4: The Heart of the Matter – The Renovation Journey (Weeks 19-24)
- Phase 5: Embracing Your New Kitchen – Post-Renovation Enjoyment (Beyond Week 24)
- Conclusion
Phase 1: The Blueprint for Success – Pre-Planning Your Kitchen Renovation Timeline (Weeks 1-8)
Before any hammers swing or cabinets are ordered, a significant amount of groundwork needs to happen. This pre-planning phase is arguably the most critical part of your kitchen renovation timeline. Rushing through it is a common mistake that leads to costly errors and delays down the line.
Setting Your Vision and Budget
First things first: what do you envision for your new kitchen? Is it a sleek, modern space, a cozy farmhouse hub, or something in between? Gather inspiration from magazines, Pinterest, Houzz, and showroom visits. Define your “must-haves” versus your “nice-to-haves.” This clarity will guide all subsequent decisions.
Equally important is setting a realistic budget. Kitchen renovations can range dramatically in cost. Factor in everything: design fees, demolition, new appliances, cabinets, countertops, flooring, lighting, plumbing, electrical work, and a crucial contingency fund (10-20% of your total budget) for unexpected issues. Be honest about what you can comfortably afford, as this will heavily influence your material choices and the scope of work. A detailed budget is a cornerstone of a successful kitchen renovation timeline.
Assembling Your Dream Team
Unless you’re a seasoned DIYer with extensive experience, you’ll likely need professionals. This team might include:
- Kitchen Designer: For layout optimization, material selection, and aesthetic coherence.
- Architect/Structural Engineer: If you’re making significant structural changes (e.g., removing a wall).
- General Contractor: To manage the entire project, coordinate subcontractors (plumbers, electricians, carpenters), and ensure quality and adherence to the schedule.
Start researching and interviewing professionals early. Look for experience, references, proper licensing, and insurance. Get multiple quotes and ensure they clearly outline the scope of work and payment schedules. Establishing a good rapport with your contractor is vital for keeping your kitchen renovation timeline on track.
Understanding Permits and Regulations
Don’t overlook the bureaucratic side of things. Many kitchen renovations, especially those involving plumbing, electrical, or structural changes, require permits from your local municipality. Your contractor or architect should be able to guide you through this process. Applying for and obtaining permits can take several weeks, so factor this into your initial kitchen renovation timeline. Starting work without the necessary permits can lead to fines, stop-work orders, and future difficulties when selling your home.
Phase 2: Bringing the Vision to Life – Design and Procurement (Weeks 9-16)
With your budget set and your team assembled, it’s time to translate your vision into concrete plans and start making tangible selections. This phase focuses on detailed design and securing the materials that will shape your new kitchen.
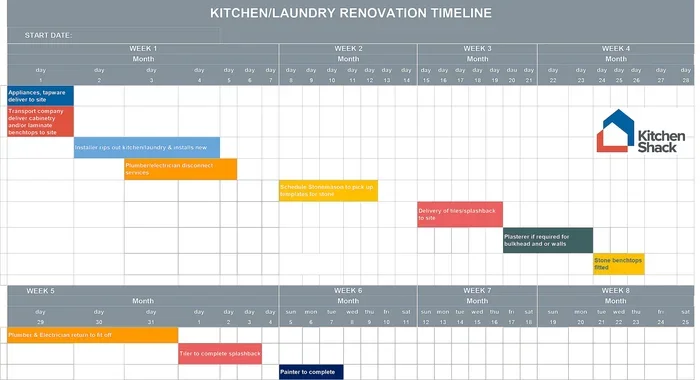
Visual guide about How to Plan the Perfect Kitchen Renovation Timeline
Image source: kitchenshack.com.au
Finalizing Your Layout and Aesthetic
Work closely with your kitchen designer to finalize the layout. This includes cabinet placement, appliance locations, island design, and overall flow. Consider functionality, ergonomics, and how you use your kitchen daily. Review 3D renderings and floor plans until you are completely satisfied. Changes made at this stage are relatively easy; changes made during construction are often expensive and time-consuming, completely derailing your kitchen renovation timeline.
Simultaneously, make all your aesthetic choices. This means choosing cabinet styles, finishes, hardware, countertop materials, backsplash tiles, flooring, lighting fixtures, and paint colors. Try to see samples in your home’s lighting to ensure they match your vision. It’s often helpful to create a mood board to see how all the elements come together.
Navigating Material Selections and Lead Times
This is where understanding lead times becomes absolutely crucial for your kitchen renovation timeline. Many key components of your kitchen are not immediately available off the shelf. Here’s a general idea:
- Custom Cabinets: Can take 8-16 weeks or even longer, depending on complexity and manufacturer.
- Semi-Custom Cabinets: Typically 4-8 weeks.
- Stock Cabinets: Often available immediately or within a few weeks.
- Countertops: Quartz and natural stone slabs require templating after cabinets are installed, then fabrication and installation, totaling 2-4 weeks after templating. Special order materials can have longer lead times.
- Specialty Appliances: High-end ranges, built-in refrigerators, or custom ventilation systems can have lead times of 4-12 weeks, especially post-pandemic.
- Flooring, Tiles, Fixtures: These can vary from immediate availability to several weeks for special orders.
Order items with the longest lead times first! This proactive approach is essential for preventing bottlenecks later in your kitchen renovation timeline. Your contractor will help you determine the exact timing for ordering each item.
Securing Your Deliveries
Once ordered, coordinate delivery schedules with your contractor. You’ll want materials to arrive a few days to a week before they are needed, but not so early that they clutter your home or risk damage on-site. Ensure there’s a safe, dry place for materials to be stored once they arrive. Double-check all deliveries against your order to catch any errors or damaged goods immediately.
Phase 3: Gearing Up for Transformation – Pre-Construction Preparations (Weeks 17-18)
The waiting period for materials to arrive can feel long, but it’s a critical window for final preparations. This phase ensures everything is in place for a smooth transition into the construction phase of your kitchen renovation timeline.
Scheduling the Symphony
With most materials ordered and lead times confirmed, your contractor can now create a detailed work schedule. This schedule will outline when each subcontractor (demolition crew, plumbers, electricians, carpenters, flooring installers, painters, etc.) will be on site. Understand this schedule, but also remember it’s a living document – flexibility is key. Your contractor should also confirm inspection dates with local authorities.
Creating Your Temporary Kitchen Sanctuary
Living without a functioning kitchen can be challenging, but a temporary setup can make it much more bearable. Designate an area (e.g., dining room, garage, basement) for a makeshift kitchen. Equip it with a microwave, toaster oven, hot plate, mini-fridge, and access to a water source (like a laundry sink). Stock up on disposable plates and cutlery to minimize dishwashing. Planning for this temporary phase helps reduce stress during the actual renovation and keeps your household running smoothly.
Protecting Your Home
Renovations are messy! Before demolition begins, take steps to protect the rest of your home. Cover doorways and open passageways with plastic sheeting to contain dust. Lay down drop cloths or cardboard on floors in high-traffic areas leading to the kitchen. Move valuable items, artwork, and furniture from adjacent rooms. Consider turning off your HVAC system during particularly dusty periods to prevent dust from circulating throughout your home. Good preparation here can save hours of cleaning later and protect your belongings.
Phase 4: The Heart of the Matter – The Renovation Journey (Weeks 19-24)
This is where the magic happens, or at least, the major physical transformation. While exciting, it’s also the most disruptive phase. A well-managed kitchen renovation timeline is essential here to keep everything moving efficiently.
Demolition and Rough-Ins (Week 19-20)
- Demolition: This is often the quickest and messiest part. Old cabinets, countertops, flooring, and appliances are removed. This usually takes 1-3 days.
- Framing (if structural changes): If walls are moved or new openings created, framing will occur.
- Rough-Ins: This involves running new electrical wires, plumbing pipes, and HVAC ductwork according to the new design. It’s critical that these are done correctly and inspected before walls are closed up. Inspections typically occur after rough-ins are complete.
During this stage, your contractor will be coordinating closely with plumbers, electricians, and other trades. Your clear design plan from Phase 2 will be invaluable here, ensuring everyone knows precisely where everything should go.
Installation of Core Components (Week 21-23)
- Insulation and Drywall: Once rough-ins pass inspection, insulation is installed, followed by drywall. Taping, mudding, and sanding create smooth walls and ceilings, ready for paint.
- Flooring: Depending on the type, flooring might go in before or after cabinets. Hardwood and tile often go in before, while vinyl or laminate might be installed after.
- Cabinet Installation: This is a major milestone. Cabinets are meticulously installed, ensuring they are level, plumb, and securely fastened. This can take several days to a week.
- Countertop Templating and Installation: After cabinets are installed, the countertop fabricator will come to make precise templates. This usually takes a day. Then, there’s a waiting period (1-2 weeks) for fabrication before installation.
Staying in constant communication with your contractor is key during these weeks. There will be noise, dust, and a lot of activity. Regular site visits (as agreed upon with your contractor) can help you stay informed and address minor issues proactively, keeping your kitchen renovation timeline on track.
Finishing Touches and Appliances (Week 24)
- Painting: Walls and ceilings are prepped and painted.
- Backsplash Installation: Tiles are carefully laid and grouted.
- Appliance Installation: Your new refrigerator, oven, dishwasher, microwave, and other appliances are moved in and hooked up.
- Plumbing and Electrical Finish Work: Sinks, faucets, light fixtures, outlets, and switches are installed.
- Final Details: Hardware is attached to cabinets, trim is installed, and any last touch-ups are completed.
This stage brings your kitchen to life! The transformation from a construction zone to a functional, beautiful space is truly exciting. It’s also often the stage where minor adjustments and unforeseen small issues surface, so keep that contingency fund ready.
Phase 5: Embracing Your New Kitchen – Post-Renovation Enjoyment (Beyond Week 24)
The hard work is done! Now it’s time to enjoy the fruits of your labor and properly settle into your stunning new space.
The Grand Reveal and Punch List
Once all construction is complete, your contractor will conduct a final walkthrough with you. This is your opportunity to carefully inspect every detail. Look for any imperfections, incomplete tasks, or issues that need attention. This list of items is called a “punch list.” It might include things like a loose cabinet pull, a paint touch-up, or a minor adjustment to an appliance. Your contractor should commit to a timeline for completing these items promptly. Hold back a final payment percentage (e.g., 5-10%) until the punch list is fully addressed to your satisfaction.
Settling In and Maintenance
After the final cleaning, it’s time to move your kitchen items back in and organize your new space. Take your time to arrange your dishes, pantry items, and small appliances in a way that maximizes efficiency and joy. Read all appliance manuals and understand maintenance recommendations for your specific materials (e.g., how to clean countertops, care for your new floor). Regular maintenance will ensure your kitchen looks fantastic for years to come.
Remember, a kitchen renovation is a marathon, not a sprint. While the numbers of weeks provided are estimates, the sequence of events and the importance of each phase remain constant. By meticulously planning and adhering to your kitchen renovation timeline, you’re not just building a kitchen; you’re building a foundation for years of happy memories.
Conclusion
Planning the perfect kitchen renovation timeline is the bedrock of a successful and satisfying project. From the initial spark of inspiration and the careful calibration of your budget to the final celebratory meal in your new space, each phase plays a vital role. While the journey might have its twists and turns – a delayed delivery here, an unexpected discovery there – a well-structured timeline, coupled with clear communication and a little flexibility, will see you through.
Embrace the process, work closely with your chosen professionals, and make informed decisions at every step. By dedicating time and effort to your kitchen renovation timeline, you’ll not only mitigate stress but also ensure that your dream kitchen emerges exactly as you envisioned it: a beautiful, functional, and enduring heart of your home. Enjoy the transformation!
Frequently Asked Questions
What’s the very first step in planning a kitchen renovation timeline?
The very first step is to define your vision and set a realistic budget. Understanding what you want and how much you can spend will guide all subsequent decisions and lay a solid foundation for your kitchen renovation timeline.
How early should I order custom cabinets and special appliances?
You should order custom cabinets and special appliances as early as possible in your kitchen renovation timeline, ideally once your design is finalized. Lead times can range from 8 to 16 weeks or more, so ordering early prevents significant delays later on.
Do I need an architect for a kitchen renovation?
You typically only need an architect for a kitchen renovation if you are planning significant structural changes, such as removing load-bearing walls or altering the footprint of your home. For most cosmetic or layout changes within the existing structure, a good kitchen designer and general contractor are usually sufficient.
What are rough-ins in a kitchen renovation?
Rough-ins refer to the installation of new plumbing, electrical wiring, and HVAC ductwork behind the walls, floors, and ceilings before they are closed up with drywall. These critical installations must be completed and inspected before the finishing stages can begin.
How long does the demolition phase typically last?
The demolition phase of a kitchen renovation is usually one of the quickest parts, often lasting only 1 to 3 days. However, this can vary depending on the size of your kitchen and the extent of the demolition required.
Is it better to install flooring before or after cabinets?
For solid surfaces like hardwood or tile, it’s generally better to install the flooring first. This creates a more seamless look and allows for easier future replacement of cabinets. For floating floors like laminate or some vinyl, installing after cabinets can be acceptable.