
No time or oven? No problem! These 5 no-bake dessert recipes are perfect for satisfying your sweet tooth without turning on the stove. From creamy cheesecakes to fruity parfaits, each recipe is simple, fast, and requires minimal ingredients.
Key Takeaways
- No oven needed: All recipes skip the baking step, making them ideal for summer or busy days.
- Quick prep time: Most desserts take under 30 minutes to assemble, perfect for last-minute cravings.
- Kid-friendly: Easy steps and fun textures make these treats great for family cooking.
- Customizable: Swap ingredients to match dietary needs or flavor preferences.
- Minimal cleanup: Fewer dishes and no hot pans mean more time enjoying dessert.
- Refrigerator-set: Chilling does the work for you—no guesswork or timers needed.
- Impressive results: These desserts look and taste gourmet, even for beginners.
Quick Answers to Common Questions
Can I freeze no-bake desserts?
Yes! Many no-bake desserts, like chocolate peanut butter bars and cheesecake, freeze well. Wrap tightly and store for up to 3 months. Thaw in the fridge before serving.
Do no-bake desserts need to be refrigerated?
Most do, especially those with dairy or fresh fruit. Always chill to set and store in the fridge to keep them safe and firm.
Can I make no-bake desserts vegan?
Absolutely! Use plant-based cream cheese, coconut cream, and dairy-free chocolate to adapt most recipes.
How long do no-bake desserts take to set?
Typically 2–4 hours in the fridge, but overnight is best for full firmness and flavor development.
What’s the easiest no-bake dessert for kids to make?
Strawberry yogurt parfaits are perfect—no mixing, no heat, and kids love layering the ingredients.
📑 Table of Contents
Why No-Bake Desserts Are a Game-Changer
Let’s be honest—sometimes the last thing you want to do is preheat the oven, wait for it to warm up, and then spend an hour baking a dessert that might not even turn out right. Whether it’s a sweltering summer afternoon, you’re short on time, or your oven is on the fritz, no-bake desserts come to the rescue. These treats skip the heat entirely, relying instead on chilling, freezing, or simply setting in the fridge to firm up. The result? Delicious, satisfying sweets that are as easy to make as they are to eat.
No-bake desserts aren’t just a shortcut—they’re a smart choice. They’re perfect for kids’ birthday parties, potlucks, or when you’re craving something sweet after dinner but don’t want to spend hours in the kitchen. Plus, they often use pantry staples like graham crackers, cream cheese, whipped topping, and chocolate, so you probably already have most of what you need. With a little creativity and a few simple techniques, you can whip up desserts that look fancy and taste even better—all without breaking a sweat.
What Makes a Great No-Bake Dessert?
Great no-bake desserts share a few key traits: simplicity, flavor, and texture. They don’t need fancy equipment or hard-to-find ingredients. Instead, they rely on smart layering, chilling, and combining ingredients that complement each other. Think creamy layers, crunchy bases, and bursts of fruit or chocolate. The best part? You don’t need to be a pastry chef to pull them off. With a few basic tools—like a mixing bowl, spatula, and refrigerator—you’re all set.

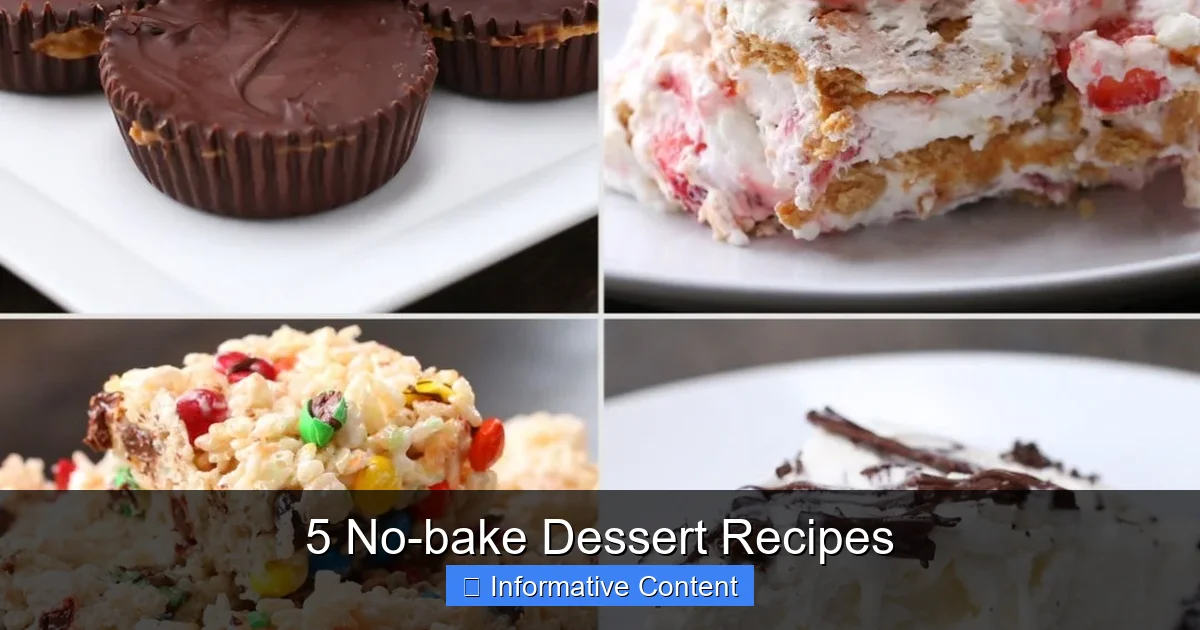
Visual guide about 5 No-bake Dessert Recipes
Image source: simplejoy.com
Another hallmark of a great no-bake dessert is versatility. Many recipes let you swap in your favorite fruits, nuts, or sweeteners. Want a vegan version? Use coconut cream instead of dairy. Need a gluten-free option? Try almond flour crusts or gluten-free cookies. The flexibility means you can adapt recipes to fit your diet, taste, or what’s in your fridge. Plus, because they don’t require precise oven temperatures or baking times, there’s less room for error—making them ideal for beginners and seasoned cooks alike.
Common Ingredients in No-Bake Desserts
Most no-bake desserts rely on a few core ingredients that create structure, sweetness, and creaminess. Here’s what you’ll often find:
- Graham crackers or cookies: These form the base of many desserts, like cheesecakes or bars. They’re crushed and mixed with butter to create a firm crust.
- Cream cheese: A staple in no-bake cheesecakes, it adds richness and helps the dessert set.
- Whipped topping (like Cool Whip): Lightens the texture and adds sweetness without extra sugar.
- Condensed milk: Adds creaminess and sweetness, often used in mousse or fudge recipes.
- Gelatin or agar-agar: Helps desserts set without heat—great for panna cotta or jelly layers.
- Fresh fruit: Berries, bananas, and mangoes add natural sweetness and color.
- Chocolate: Melts easily and sets when chilled, perfect for mousse, bark, or drizzles.
These ingredients are affordable, widely available, and often already in your pantry. That means you can start making no-bake desserts with minimal shopping.
Tips for No-Bake Success
Even though no-bake desserts are simple, a few tips can make them even better:
- Chill thoroughly: Most no-bake desserts need at least 2–4 hours in the fridge to set. For best results, let them chill overnight.
- Use a springform pan or dish: These make it easy to remove desserts without breaking them.
- Press the crust firmly: A compact crust holds its shape and supports the layers above.
- Layer carefully: Pour or spread each layer gently to avoid mixing colors or textures.
- Cover while chilling: Use plastic wrap or a lid to prevent odors from the fridge from affecting the flavor.
- Let ingredients come to room temperature: Cream cheese and butter mix better when not cold, leading to a smoother texture.
With these tricks, your desserts will look professional and taste amazing every time.
Recipe 1: Classic No-Bake Cheesecake
If you’ve never made a no-bake cheesecake, you’re in for a treat. This dessert is creamy, rich, and incredibly satisfying—without ever touching the oven. It’s perfect for beginners and a crowd-pleaser at any gathering. The secret? A simple graham cracker crust and a filling made from cream cheese, sugar, and whipped topping. Add fruit on top, and you’ve got a dessert that looks like it came from a bakery.
Ingredients
- 1 ½ cups graham cracker crumbs (about 10–12 crackers)
- 6 tablespoons melted butter
- 1 (8 oz) package cream cheese, softened
- 1 cup powdered sugar
- 1 teaspoon vanilla extract
- 1 (8 oz) container whipped topping (like Cool Whip), thawed
- Fresh berries or fruit compote for topping (optional)
Instructions
- In a bowl, mix graham cracker crumbs and melted butter until it resembles wet sand. Press firmly into the bottom of a 9-inch springform pan or pie dish. Chill while preparing the filling.
- In a large bowl, beat cream cheese until smooth. Add powdered sugar and vanilla, and beat until creamy.
- Gently fold in the whipped topping until fully combined. Be careful not to overmix—you want it light and fluffy.
- Spread the filling evenly over the crust. Smooth the top with a spatula.
- Cover and refrigerate for at least 4 hours, or preferably overnight, to set.
- Before serving, top with fresh berries, sliced fruit, or a drizzle of fruit compote.
Serving and Storage Tips
This cheesecake serves 8–10 people and keeps well in the fridge for up to 5 days. For a festive touch, garnish with mint leaves or a dusting of powdered sugar. If you’re making it ahead, assemble it the night before and store it covered. The flavors meld and the texture improves with time.
Want to customize it? Try adding lemon zest for a citrus twist, or swirl in chocolate sauce before chilling. You can also use Oreo crumbs instead of graham crackers for a chocolate crust. The possibilities are endless!
Recipe 2: Chocolate Peanut Butter Bars
Rich, fudgy, and packed with peanut butter flavor, these chocolate peanut butter bars are a no-bake dream. They’re made with just five ingredients and take less than 20 minutes to prepare. Plus, they’re freezer-friendly, so you can make a big batch and enjoy them all week. Whether you’re a chocolate lover or a peanut butter fanatic, these bars will hit the spot.
Ingredients
- 1 cup creamy peanut butter
- ½ cup honey or maple syrup
- 1 teaspoon vanilla extract
- 2 cups powdered sugar
- 1 ½ cups semi-sweet chocolate chips
- 1 tablespoon coconut oil or butter (optional, for smoother chocolate)
Instructions
- Line an 8×8-inch baking dish with parchment paper, leaving overhang on the sides for easy removal.
- In a large bowl, mix peanut butter, honey, and vanilla until smooth.
- Gradually add powdered sugar, stirring until a thick, dough-like consistency forms. If it’s too dry, add a teaspoon of honey. If too sticky, add a bit more powdered sugar.
- Press the mixture evenly into the prepared dish. Smooth the top with a spatula or your hands.
- In a microwave-safe bowl, melt chocolate chips with coconut oil in 30-second intervals, stirring between each, until smooth.
- Pour the melted chocolate over the peanut butter layer and spread evenly.
- Refrigerate for at least 2 hours, or until firm. For faster setting, freeze for 30–45 minutes.
- Lift the bars out using the parchment paper and cut into 16 squares.
Serving and Storage Tips
These bars are best served chilled but can be left at room temperature for 10–15 minutes before eating for a softer texture. Store in an airtight container in the fridge for up to 2 weeks or in the freezer for up to 3 months. They’re perfect for lunchboxes, after-school snacks, or post-dinner treats.
For a fun twist, sprinkle sea salt on top before the chocolate sets, or add chopped peanuts or mini chocolate chips into the peanut butter layer. You can also use almond butter or sunflower seed butter for a nut-free version.
Recipe 3: Strawberry Yogurt Parfaits
Light, refreshing, and packed with fresh fruit, these strawberry yogurt parfaits are a healthy-ish no-bake dessert that feels indulgent. Layered with creamy yogurt, sweet strawberries, and crunchy granola, they’re perfect for breakfast, dessert, or a midday snack. Plus, they’re customizable—swap in your favorite fruits or yogurt flavors to match your mood.
Ingredients
- 2 cups plain or vanilla Greek yogurt
- 2 cups fresh strawberries, hulled and sliced
- 2 tablespoons honey or agave syrup
- 1 teaspoon lemon juice
- 1 cup granola (store-bought or homemade)
- Fresh mint leaves for garnish (optional)
Instructions
- In a small bowl, toss strawberries with honey and lemon juice. Let sit for 10–15 minutes to macerate and release juices.
- In serving glasses or jars, layer the ingredients: start with a spoonful of yogurt, then a layer of strawberries, a sprinkle of granola, and repeat.
- Top with a final layer of yogurt and a few strawberry slices.
- Garnish with mint leaves if desired.
- Serve immediately, or chill for up to 2 hours before serving.
Serving and Storage Tips
These parfaits are best enjoyed fresh, but you can prep the components ahead of time. Store yogurt, strawberries, and granola separately in the fridge, then assemble just before serving to keep the granola crunchy. For a vegan version, use coconut yogurt and maple syrup.
Try swapping strawberries for blueberries, peaches, or mango. You can also add a drizzle of chocolate or a sprinkle of chia seeds for extra flavor and nutrition. These parfaits are as versatile as they are delicious.
Recipe 4: No-Bake Chocolate Mousse
Silky, airy, and deeply chocolatey, this no-bake chocolate mousse is a showstopper dessert that requires no eggs, no oven, and no fancy equipment. Made with just four ingredients—chocolate, cream, sugar, and vanilla—it’s rich enough to satisfy any chocolate craving. The secret is whipping the cream to stiff peaks and folding it gently into melted chocolate for a light, cloud-like texture.
Ingredients
- 8 oz semi-sweet or dark chocolate, chopped
- 1 ½ cups heavy whipping cream
- 2 tablespoons powdered sugar
- 1 teaspoon vanilla extract
Instructions
- In a heatproof bowl, melt chocolate over a pot of simmering water (double boiler method) or in the microwave in 30-second intervals, stirring until smooth. Let cool slightly.
- In a large bowl, whip cream, powdered sugar, and vanilla until stiff peaks form. Be careful not to over-whip.
- Gently fold one-third of the whipped cream into the melted chocolate to lighten it. Then, fold in the remaining cream until no white streaks remain.
- Spoon the mousse into serving glasses or ramekins.
- Chill for at least 2 hours, or until set.
- Serve with whipped cream, chocolate shavings, or fresh berries on top.
Serving and Storage Tips
This mousse is best served chilled and can be made up to 2 days ahead. Store covered in the fridge. For a dairy-free version, use coconut cream and dairy-free chocolate. The mousse pairs beautifully with coffee or a glass of dessert wine.
Want to add flavor? Stir in a tablespoon of espresso powder for a mocha twist, or a splash of orange liqueur for a citrusy kick. This dessert is elegant enough for dinner parties but simple enough for a weeknight treat.
Recipe 5: Banana Pudding Cups
Classic banana pudding gets a no-bake makeover in these individual cups. Layers of vanilla pudding, sliced bananas, and vanilla wafers come together in minutes for a nostalgic dessert that’s creamy, sweet, and full of texture. Perfect for parties or portion control, these cups are easy to make and even easier to eat.
Ingredients
- 1 (3.4 oz) box instant vanilla pudding mix
- 2 cups cold milk
- 1 cup whipped topping, thawed
- 2–3 ripe bananas, sliced
- 1 cup vanilla wafers, crushed
- Extra vanilla wafers for garnish
Instructions
- In a bowl, whisk pudding mix and cold milk for 2 minutes until thickened. Let sit for 5 minutes to fully set.
- Fold in whipped topping until smooth.
- In serving cups, layer: pudding, banana slices, crushed wafers, and repeat.
- Top with a final layer of pudding and a whole vanilla wafer.
- Chill for at least 1 hour before serving.
Serving and Storage Tips
These cups are best served within 24 hours, as bananas can brown. To prevent this, toss banana slices in a little lemon juice before layering. Store covered in the fridge. For a twist, use chocolate pudding or add a layer of caramel sauce.
Conclusion: Sweet Simplicity Without the Heat
No-bake desserts prove that you don’t need an oven to create something delicious. Whether you’re short on time, avoiding heat, or just want a fuss-free treat, these five recipes offer something for everyone. From creamy cheesecakes to fruity parfaits, each one is simple, satisfying, and ready in minutes. Plus, they’re easy to customize, so you can make them your own.
The next time you’re craving something sweet, skip the baking sheet and reach for a mixing bowl instead. With these no-bake dessert recipes, you’ll enjoy all the flavor and none of the hassle. So go ahead—chill, layer, and indulge. Your taste buds (and your kitchen) will thank you.
Frequently Asked Questions
Are no-bake desserts healthier than baked ones?
Not necessarily, but they often use fewer processed ingredients and skip added fats from baking. Some, like fruit parfaits, can be lighter and fresher.
Can I use frozen fruit in no-bake desserts?
Yes, but thaw and drain it first to avoid excess water, which can make desserts soggy.
What if my no-bake cheesecake won’t set?
Make sure cream cheese is fully softened and whipped topping is well incorporated. Chill longer—sometimes 6–8 hours or overnight is needed.
Can I make no-bake desserts gluten-free?
Yes! Use gluten-free cookies, almond flour, or oats to replace regular graham crackers or crusts.
Do no-bake desserts taste as good as baked ones?
Absolutely! Many no-bake desserts have rich, creamy textures and bold flavors that rival their baked counterparts.
What’s the best way to store no-bake desserts?
Keep them covered in the refrigerator. Use airtight containers or plastic wrap to prevent drying out or absorbing odors.